Has your shower been in the house since it was built? Did you ever replace it? How many generations of people have already used it?
You may be thinking that you are not even touching the showerhead when you shower, so what’s the point in cleaning it is.
It might have not even passed over your mind, but the shower is one of the most used items in the bathroom. Have you considered cleaning it? When was the last time you cleaned your shower head?
For all you know, it can still get clogged from all the calcium deposits and develop some gross bacteria inhabitants. Keeping your shower head clean is a must for it not to accumulate mildew and mold that may be carrying harmful bacteria that can affect us.
Having an old shower does not only look unattractive, but it might even be contributing to your high monthly water bill.
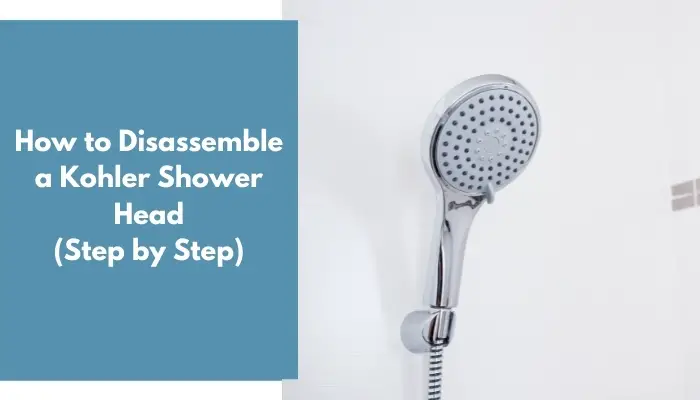
There are shower heads with removable faceplates, which would be convenient for you. You can see the screws on the front of the showerhead. You will have a lesser excuse not to clean your showers. If you are having trouble cleaning it, here are the steps on how to disassemble a Kohler showerhead and also the ways on how to clean it.
Contents
- 1 Step-by-Step Guide on How to Take Apart a Kohler Shower Head
- 2 Why Do You Need to Disassemble a Kohler Shower Head?
- 3 Do Shower Heads Need to Be Cleaned?
- 4 How to Clean Kohler Shower Head?
- 5 How Long Should You Soak Your Shower Head in Vinegar?
- 6 How Do You Clean a Shower Head Without Vinegar?
- 7 Summary
Step-by-Step Guide on How to Take Apart a Kohler Shower Head
Step 1: Protect your showerhead from possible scratches
You don’t want your fixture to be scratched, so you can try wrapping a thin hand towel or some paper towel around the showerhead angled pipe and the shower arm.
Step 2: Detach the shower head
Using a pipe wrench, hold the shower arm firmly. While doing so, grip the shower’s collar nut with *adjustable pliers and turn it counterclockwise to unscrew the nut. Get a clean *strap wrench and use it to remove the Kohler showerhead from the shower arm.
Step 3: Disassemble the shower head
Using a *bladed screwdriver or *needle-nose pliers, carefully remove the screen washer of your showerhead. Clean the screen washer with tap water. Carefully remove the mesh filter screen using the pliers and pry it away to reveal the water flow regulator.
Using the bladed screwdriver’s tip, put a little pressure on the water flow regulator until you pop it free. Remove the faceplate’s screws using the screwdriver. After that, you can now proceed to clean the nozzles.
Why Do You Need to Disassemble a Kohler Shower Head?
You will not know how dirty your showerhead is until you take it apart. You have to see what is inside for you to diagnose if there is a problem that needs to be fixed or it merely needs cleaning. Replacing it with a new one is a lot costly than cleaning it.
Do Shower Heads Need to Be Cleaned?
A leaking shower head can be annoying because of the constant dripping of water. It is not just the noise that will bother you. It also wastes water. If the leak resumes for a long time, it can result in more problematic situations like dry rot or mold in your bathroom.
This is why it is good to check and disassemble your Kohler showerhead when you notice some irregularities with its water output.
You may also experience poor showerhead performance, such as reduced water flow or uneven spray. These problems can be signs that your showerhead has mineral buildups that may cause clogging on the showerhead’s holes, nozzles, and filters.
For it to be fixed and for its great performance to be back, you can either replace it with a new one or disassemble it for you to clean it properly.
It is recommended that you clean your showerhead at least once a month, but they certainly recommend cleaning your showerheads every week for some neat freaks.
How to Clean Kohler Shower Head?
If you are not a fan of cleaning because of a hectic schedule at work or home, do not worry. Cleaning your Kohler shower head is simple and easy.
Here are the ways on how you can clean your showerhead. We have included a quick cleanse and a deep cleanse for your showers so that you can decide what will work most for you.
Quick Cleanse for Your Showerhead
This process will be helpful for those who do not have a lot of time to spare in cleaning their showers. These are steps that you can follow and do on a regular basis.
Materials:
- Large and sturdy resealable plastic bag
- Rubber band
- Distilled white vinegar
- Soft brush or old toothbrush
- Pour the distilled vinegar into the resealable plastic bag. Typically, you need about 12 oz of vinegar, but depending on your showerhead size, you can adjust the measurements. Just make sure that it is enough to soak the whole showerhead.
- Get the resealable plastic bag with vinegar and insert the showerhead on it. Secure it firmly around the shower arm by wrapping the plastic bag’s ends to it with rubber bands.
- You can let it soak for a minimum of one hour, but it would be best to leave it overnight.
- Once it is done soaking, remove the plastic bag, and let the showerhead run hot water for five to ten minutes. This process is needed to remove the vinegar that may have soaked the nozzles.
- Using a soft brush or old toothbrush, scrub the showerhead for any mineral deposits that remained and were not dissolved by the vinegar.
- Let your shower pour water for about five minutes just to make sure that it is cleaned thoroughly.
Deep Cleanse for Your Showerhead
If you are up for some general cleaning or have free time to spare, try deep cleansing your shower.
Materials:
- Wrench
- Small cloth/towel
- Distilled white vinegar
- Soft brush or old toothbrush
- Deep bowl
- Toothpick
- Follow the steps given in the former part of this article to detach and disassemble the showerhead. Again, make sure to use a small cloth or towel to avoid scratching your showerhead in the process of removing it.
- Put the showerhead under warm running water to get rid of the mineral deposit.
- Pour the distilled white vinegar into the deep bowl. Use an amount that is enough to soak the whole showerhead. Let it soak overnight.
- After a whole night of soaking, rinse the showerhead with warm water. Scrub it diligently using the toothbrush. Using the toothpick, you can poke each nozzle just to make sure that it is all unclogged.
- Put the showerhead on running water to get rid of the vinegar residue.
- Attach your showerhead back to the shower arm.
How Long Should You Soak Your Shower Head in Vinegar?
The only thing you have to remember when soaking your showerhead in vinegar is that the more soiled or corroded a showerhead is, the more hours it needs to be soaked in vinegar.
Most of the time, an hour or two will be good enough, but if you want to be sure that you get rid of all the mineral buildup and gunk, it is best to leave it for a whole night.
Another option is placing your showerhead on a pot with vinegar and boiling it for 15 minutes. Take note that you should only do this if your showerhead is made up of metal.
How Do You Clean a Shower Head Without Vinegar?
Using vinegar in cleaning your showerhead is the traditional and most used way. If you are looking for some option to clean your showerhead, we got you covered.
Here are the ways on how to clean your showerhead without using vinegar.
Using Baking Soda
Baking soda is one of the trusted remedies for wiping off stains on many surfaces, so you can also try this safe home staple and use it on your shower head.
- Detach the shower head to the shower arm. You can run water to the showerhead to dislodge calcium buildup or dislodge some grains or debris. You can use a soft brush or just your finger. Rub it across the showerhead’s nozzle in a back and forth motion.
- Get a large bowl and pour some baking soda and water in it. Create a mixture that is enough to submerge the showerhead.
- Let the showerhead soak for about 15 minutes. Remember that baking soda is harder to wash off, so make sure that you don’t let it soak for a long time.
- Wash off the showerhead on running water and scrub it with a brush until all the dirt is gone.
- Fasten the shower head back to the shower arm and tighten it firmly.
Using Oven Cleaner
An oven cleaner is proven effective to clean grease, stuck, and baked-on food, so it can also help your showerhead get rid of some stubborn gunk.
Moreover, you do not need to disconnect and disassemble your showerhead so that it can save you a lot of time.
- Wear some plastic gloves and a mask before you handle the oven cleaner. It is an abrasive cleaner, and it has a potent smell. Make sure to wear some protection to avoid any irritation.
- Get the oven cleaner and spray it all over the showerhead.
- Leave it for about 15 minutes. Remember to not leave it for too long because it can damage your showerhead.
- Rinse the showerhead with hot water and let the showerhead flow for about five minutes.
Using Bleach
Bleach is a standard household cleaner that you can quickly get. It has disinfectant so it can be of help to get rid of the bacteria buildup in your showerheads.
Just remember to wear rubber gloves and use bleach in a well-ventilated place because it has a potent smell. Aside from that, please do not use it with another cleaning compound because it can have chemical reactions that may be harmful.
- Mix the bleach and water in a disposable bowl. You can take about half a cup of bleach and also half a cup of water. Mix it properly using a stick until it is diluted.
- Using a small cloth, apply the mixture to the showerhead.
- Let the showerhead soak for about five minutes and rinse it with running water.
- Wash the showerhead with some mild soap to get rid of the potent mixture and rinse it again with water.
Using Coca Cola
You have probably seen coca-cola being used in cleaning toilets and sinks, and guess what, it can also be used in your showerheads. Its acidic content is potent enough to scrub off the grimes and stains away.
Try this method and clear all your doubts about the magic of coca-cola.
- Get a resealable plastic bag and fill it with coca-cola.
- Insert the showerhead into the resealable bag and secure it to the shower arm using the rubber bands.
- Submerge the showerhead for about 20 minutes in the solution and scrub the remaining buildup using a brush.
- Rinse it with soap water to get rid of the stickiness brought by the coal. You can repeat the process if you are not yet satisfied with the results.
Summary
It can be a frustrating experience in the morning if your shower is barely flowing or it’s just trickling. Sometimes water supply and water pressure are not the cause of your problem.
A clogged showerhead can also affect your bathing time. If you do not deal with the problem immediately, it can worsen, and it will be harder to clean it.
Can you imagine the gunk and scums from your shower piling up in your face and body? Neglecting your showerhead is very unhygienic.
If you want to have a nice and clean shower time, you have to make cleaning your showerhead a routine. Do not wait for the clog to occur or for the grimes and stains to appear.
Let your showerhead cleaning duty be part of your regular bathroom cleaning regimen.
Buying a new showerhead should not be your number one solution. Sometimes, all you need to do is devote a little time to do some cleaning.
Now that you know how to disassemble a showerhead, you might consider checking your own and start cleaning it.