Getting the perfect tile and grout is a must-do in any bathroom. But, if you have loose grout, it can be dangerous and even mold-prone. Learning how to spot and repair it can fix this issue.
Bathroom grout will wash away due to various factors, such as improper installation, over-watered joints, and harsh cleaning products.
If you notice that your bathroom’s grout is crumbling and washing away, it’s essential to address it. This issue can cause problems, such as water leakage and mold growth.
This blog post will make you learn the reasons behind the fading away of grout and how you can fix it.
Contents
What Is Grout?
Grout is a mixture of cement, water, and sand used to fill the gaps between the tiles in your home. You apply this material to the areas after a particular time.
Reasons Why Grouts in Your Shower Is Washing Away
Water Is Always Overflowing
If you’re using a fast-drying or powder grout, add water to help form its consistency. However, some technicians may mix too much water into the compound, creating a soup-like character.
The grout lining of your bathroom will eventually start to crack and break after being installed. Removing the poorly mixed grout and re-surfacing it can resolve this kind of issue.
The Moisture Is Above Average
One of the biggest reasons for the peeling of grouts is the latter and above-average moisture not getting along. It can happen when water gets trapped in the most minor and most porous parts of the grout.
When applying a sealer, it’s essential to make sure that the product penetrates below the surface of the grout to prevent further moisture damage.
Grout Is Not Packed Correctly
When applying grout with a trowel, it is essential to have a certain amount of precision. If spread thinly, it can cause the product to crumble.
Removing the existing bridge and re-applying the new grout is necessary to prevent the current material from oxidizing further.
Not Sealed Properly
It would be best to seal the grout after installment to prevent it from absorbing liquids and moisture from the environment. This process will prevent it from staining, but it can also cause it to crack and fall out over time.
It’s not always easy to spot the signs of poorly sealed grout, and it can eventually lead to mold and discoloration issues. The first step is to clean the area and apply a quality sealant thoroughly.
Bad Timing of Curing Grout
Not giving the proper amount of time to cure grout can cause it to get damaged and eventually fall out. It’s essential to provide the product with enough time to harden and avoid water damage.
If the issue persists, the existing grout should be removed and replaced with a new one. It’s also important to contact a different contractor if the old one has not allowed the new one to cure correctly.
Polymer Additive Is Excessive
Sometimes, inexperienced home-improvement contractors or those who are just starting will add too much of a specific type of additive to the grout.
It can lead to the formation of pinholes on the surface, which can cause it to crack and eventually fail.
Grout Is Old
Like other components in a home, grout can eventually get worn out due to its simple wear and tear. However, it’s still important to replace it if it has become dull, stained, or unusable.
Signs That Your Shower Grout Needs Repair
Moldy Crevices
When you see the molds building up, you need to repair them. There will be times when the bathroom smell will change and may irritate you and your family taking a bath there.
Grout Lines Have Cracks
If you see signs of damage to the grout lining in your bathroom, it’s essential to have a professional inspect it. Generally, if the damage is not resolvable on your own, a professional should be able to repair it.
Tiles Are Shaky or Loose
If you notice that your tile moves when you step or push on it, it’s probably caused by loose grout. It can lead to various issues, such as broken tiles and floor damage.
You may need to re-install it with new grout if the tile is not intact. However, this is a minor fix and should be considered carefully before attempting to do it yourself.
How to Fix or Repair Shower Grout By Yourself
Scrub the Grout Line Until Clean With Water Solution
Mix a couple of water and white vinegar parts in a cup or bucket to remove the grime and dirt from the damaged grout.
Purchase a Similar-Colored Grout
Use a sample grout chip or visit a home improvement store to find the exact color match. If the color is lighter than the one from the chips, mix more water and lower the new grout by about half.
Although latex and acrylic latex are both easy to work with, they require some form of sealing. For instance, applying latex sealant is usually needed.
Use a Grout Saw to Remove the Broken Grout
A grout saw is a small, handheld tool that fits between the tiles. Utilize this tool to remove damaged or worn-out grout. You can also use it to move the damaged tile back and forth.
Follow this step to break up the damaged grout into pieces. You can also use a circular saw to remove the old layer of grout. Wear a mask while working to prevent dust and other particles from entering your nostrils.
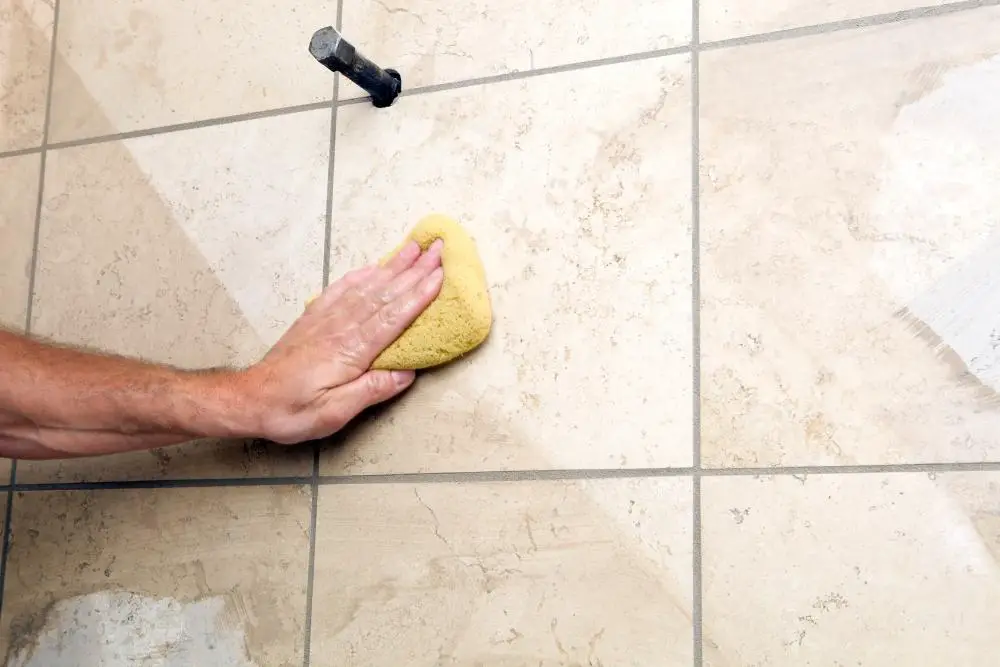
Splash Water Onto the Tiles
Before you apply new grout, make sure to clean the tiles thoroughly. This procedure will help remove any dirt buildup and make the new grout look great. Wipe the tiles with a soft wet sponge to get the most out of the new grout.
Apply the New Pack

Prices pulled from the Amazon Product Advertising API on:
Product prices and availability are accurate as of the date/time indicated and are subject to change. Any price and availability information displayed on [relevant Amazon Site(s), as applicable] at the time of purchase will apply to the purchase of this product.
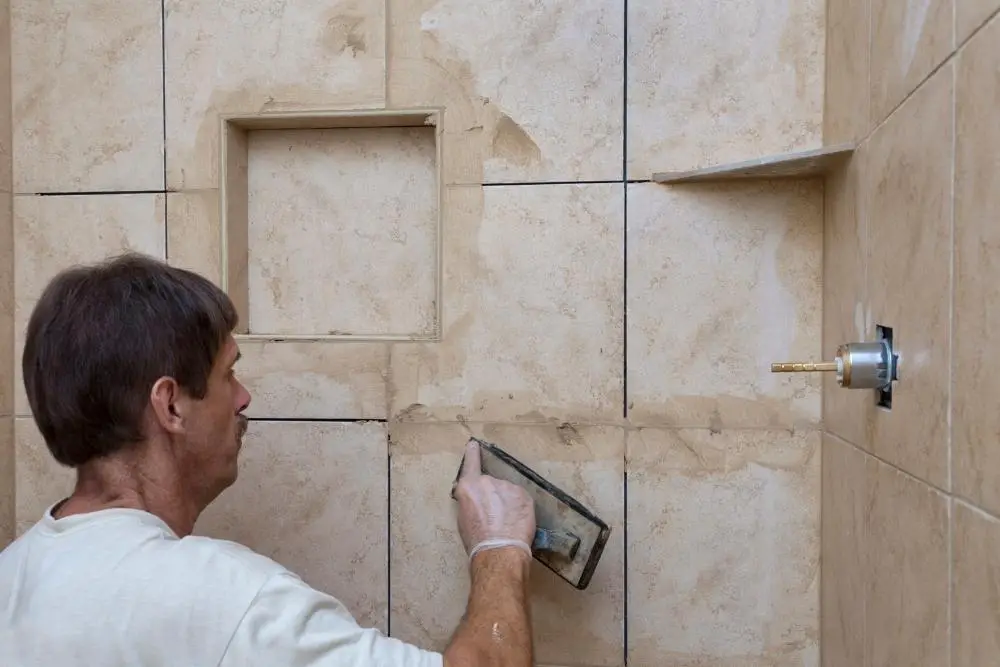
A grout float is a thick rubber pad commonly found at home improvement stores. You can adequately apply this by scooping some out of the bucket and pressing it into a tight space. This method works for most types of this material.
Position the float on the floor at a 45-degree angle and slowly drag the excess grout over the gap to thoroughly flush the floor.
Let the Grout Harden for 15-30 Minutes
After about 15 to 30 minutes, remove any excess grout using a damp grout sponge. Before using it, thoroughly remove all the excess water from the sponge. Then, use it again to clean the tiles.
You may also need to use a scrub pad to remove the haze from the tiles. Follow the manufacturer’s instructions to set the epoxy grout firmly and allow it to dry for up to 48 hours.
Put Some Sealant as a Finisher
If you’re using an old, damaged, or synthetic grout, such as acrylic latex, apply a sealer after the surface has completely dried. This method is very effective and can help restore the look and feel of your tiles.
You can also use a tile cleaner to clean it thoroughly. However, if the tiles are still uneven or tend to crack after being repaired, it may be time to have them inspected by a professional.
Conclusion
Grout washing away in the shower is a common problem in a family household. There are many reasons for this, like too much water exposure, excessive scrubbing, and wear and tear.
To fix this, removing the broken ones and applying a new pack is the quickest solution you can use. You can also ask for professional help if you don’t want to undergo such a tedious process.