To remove the flow restrictor from a peerless shower head, you may grip the arm using a standard pipe wrench to screw the nut with adjustable pliers. After that, turn the nut counterclockwise until the holder is free from the shower arm. Next step, you may now remove the washer and its filter screen from the holder’s end using needle-nose pliers, then you pry the restrictor out with a flat-head screwdriver.
A flow restrictor in your showerhead works to lessen your usage of water every bath time. In other words, a flow restrictor is like your salvation because it helps you save water, and it lowers your water bills.
Although having a flow restrictor is very helpful for some, it will also become your shower time nightmare.
Mainly, if you live in a town with low water pressure, a flow restrictor will be your problem.
The solution for your shower issues is to remove the water flow restrictor, but in exchange, your water bills might get high.
Are you ready to pay more money for your water bill to have proper water flow? And what is the best tool to remove water restrictors inside your showerhead?
These are the fundamental questions that may get into your mind right now.
As long as you are working, you’re capable of paying for adequate water supply, so if you want to solve your shower problem, you may purchase the IRWIN VISE-GRIP Adjustable Wrench homeowners usually use this. It is the best seller in the market. To know more about the flow restrictor and ways to remove it, you may continue reading below!
Contents
- 1 Remove Flow Restrictor From A Peerless Shower Head – A Step-By-Step Guide
- 2 What Tools Do You Need For This Job?
- 3 Is It Difficult To Remove The Flow Restrictor?
- 4 Why Remove Flow Restrictor From Peerless Shower Head?
- 5 Should I Remove The Showerhead Flow Restrictor?
- 6 Do All Shower Heads Have Flow Restrictors?
- 7 Summary
- 8 Resources
Remove Flow Restrictor From A Peerless Shower Head – A Step-By-Step Guide
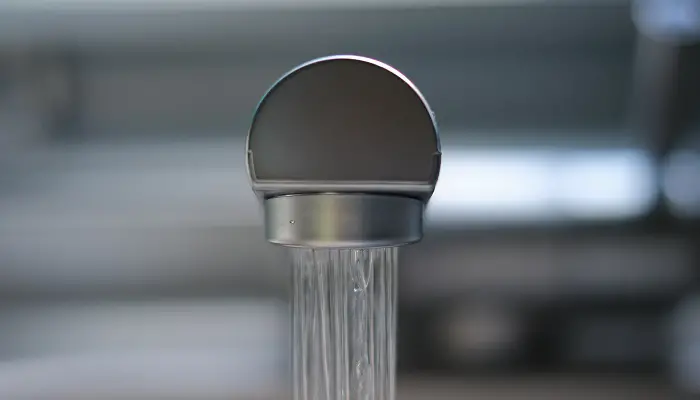
A flow restrictor is made of flat plastic, with a circular shape, and has a star-shaped metal center. It is generally located behind the metal screw part of your shower head.
Here are the step-by-step instructions that you need to follow to learn how to remove your flow restrictor.
1. Disconnect The Showerhead From The Arm
To remove the showerhead from the arm pipe, you need to unscrew it. You may use a wrench to remove it quickly.
2. Take Out The Shower Screen
Sometimes, in a showerhead, there is a mesh screen inside to catch sediment from the water. If your showerhead has this screen, you may remove it. Ensure that you remove it gently; you may use needle-nose pliers to remove the shower screen properly.
3. Remove The Gasket
Inside the showerhead, there should be a rubber O-ring or gasket. To take out the gasket, you may use a unbend paperclip.
Hence, be careful not to damage your gasket: if you do, you need to change it.
4. Take Out The Flow Restrictor
After removing the gasket, you may now see the start-shaped metal restrictor inside the plastic ring of your showerhead.
Using your unbend paper clip, place it under one part of the flow restrictor, then twist it, and pry it out to remove it.
If you’re experiencing difficulty getting out the flow restrictor with a paperclip, try using a screwdriver or needle-nose pliers as your alternative tool.
5. Return The Gasket And The Shower Screen
After achieving step 4, you may now return the gasket and shower screen in its place. Tips before returning these two parts of the showerhead, you need to clean it first with fresh water to remove the scale build-up, then put some grease to protect your gasket and help you form the seal.
6. Reattach Your Showerhead
After step 5, before reattaching your showerhead, you may first consider the following:
Remove Unwanted Materials
Before screwing your showerhead back, clean first the old plumber’s tape from the shower arms threads – you may use a damp cloth to wipe it.
To remove the stubborn deposits of your showerhead, you may scrub it using an old toothbrush.
Apply New Tape
After cleaning and removing the old tapes, you may now start applying a few layers of new tapes around your shower arm. Ensure that you wrap it clockwise so that it doesn’t unravel when you screw back your showerhead.
Reattach Your Showerhead
You may now screw back your showerhead on clockwise until it’s tight enough, then you may turn on the water to check if leeks are happening in your showerhead. If there are leaks, you can tighten it more by using a wrench.
What Tools Do You Need For This Job?
Most of the showerhead is equipped with a flow restrictor. This tool is designed to regulate the flow of your water through your showerhead.
What happens if you have an intense water pressure but because of the flow restrictor is decreased your water supply.
Furthermore, this may lead you to remove it even though it has benefits, reducing your water bill.
What tools do you need for this job?
The tools you need for this job are some of the everyday items you can get inside your household.
These are the following tools:
- A screwdriver
- An old piece of cloth
- An adjustable wrench
Once you gather all the tools you need, you may not get started with the job.
Is It Difficult To Remove The Flow Restrictor?
If you’re not a professional and you have no knowledge about plumbing, the job of removing the flow restrictor may be quite hard for you.
However, you may learn to remove it by yourself by following the instructions above. So, if you correctly follow the steps, you might efficiently finish the job.
Of course, you may take some time to finish it since it may be your first time, but it’s okay as long as you do the job correctly.
Hence, if you don’t want to hassle with the job and you have money to pay for labor, you may ask a professional plumber to do the job for you.
Why Remove Flow Restrictor From Peerless Shower Head?
Having a flow restrictor limits your water supply flow down up to 2.5 gallons per minute, resulting in your water shortage.
Indeed, having a flow restrictor gives you great benefits, such as:
1. Save Environmental Energy
It helps you reduce the use of hot water in low-flow taps and your showers time, and you can save up with 301 to 677 kWh per fitting -which benefits the environment well.
2. Lessen Water Spoilage
In terms of water-saving, a flow restrictor is the best tool for this job. It prevents your water from wasting because the flow restrictor controls its flow.
3. Reduced Your Cost
Everybody wants to save money or minimize the cost of their bills, and you are one of them.
Having the alternative to lessen your bills’ cost will always be your number one goal, especially if you have a large family living under one roof.
Using a flow restrictor will help you a lot with your water bill.
However, if you have insufficient water pressure and you can’t find the cause of this shortage, we strongly recommend you to remove your flow restrictor from your peerless showerhead.
Why suffer having a minimum water supply every day if you can pay your bills.
Furthermore, please don’t focus on how much you will pay instead of focusing on the importance of having enough water because you use it every day.
Should I Remove The Showerhead Flow Restrictor?
The water restrictor is projected to lessen your water bill and energy cost, but if you are in a location that has a low supply of water, the flow restrictor must be removed.
Removing your water restrictor might improve your shower pressure, though it will increase your water bill.
However, even your bills will increase; it is more important to have plenty of water.
Hence, removing the flow restrictor is not required for all households, only those with a hard time with their water pressure.
So, when is the right time to remove your shower head flow restrictor?
We recommend that you remove your flow restrictor after you replace the RO membrane of your showerhead.
Because over time, like RO membrane and filters, flow restriction may also get choked because of the scale build-up inside your showerhead.
If your water’s capacity doesn’t satisfy your daily needs, you must remove it right away.
Do All Shower Heads Have Flow Restrictors?
The majority of showerheads have built-in flow restrictors. It is because it helps you save water and energy.
It is also the reason why lots of homeowners purchase showers.
If your stingy type of person using a shower with a flow restrictor fits your style because you are saving money, this is not applicable for all; that’s why you need to consider some factors.
Additionally, low water pressure is somehow more prone to higher areas. So if your house is in an elevated position, you may experience low water pressure; that’s why removing the flow restrictor of your showerhead may lessen your problem.
Summary
In summary, many homeowners often misunderstand the flow restrictor, thinking that installing this tool will help them a lot. Hence, establishing a flow restrictor is not also a bad idea because it also has advantages.
One of the advantages of having a flow restrictor is reducing your bills’ cost, which will help you a lot if you’re a family man. Also, it allows you to budget your money for other expenses that lessen your stress.
However, casualties are having a flow restrictor, mainly if you’re living in an area where water pressure is low. It would help if you considered these usual factors to know the correct setting that your showerhead should have.
If you already decide to remove it for some reason, you may use the IRWIN VISE-GRIP Adjustable Wrench to help you with the job.
Lastly, water is our primary need. We use it to wash clothes, plates and also clean your body. Also, using water maintains your hygiene and keeps you away from getting sick. It is why having enough water supplies will guarantee you these benefits.
Don’t be afraid to remove your flow restrictor if you’re getting frustrated with low water pressure. The most important thing is being able to satisfy your needs.
Resources
Image credits – Photo by Leif Christoph Gottwald on Unsplash